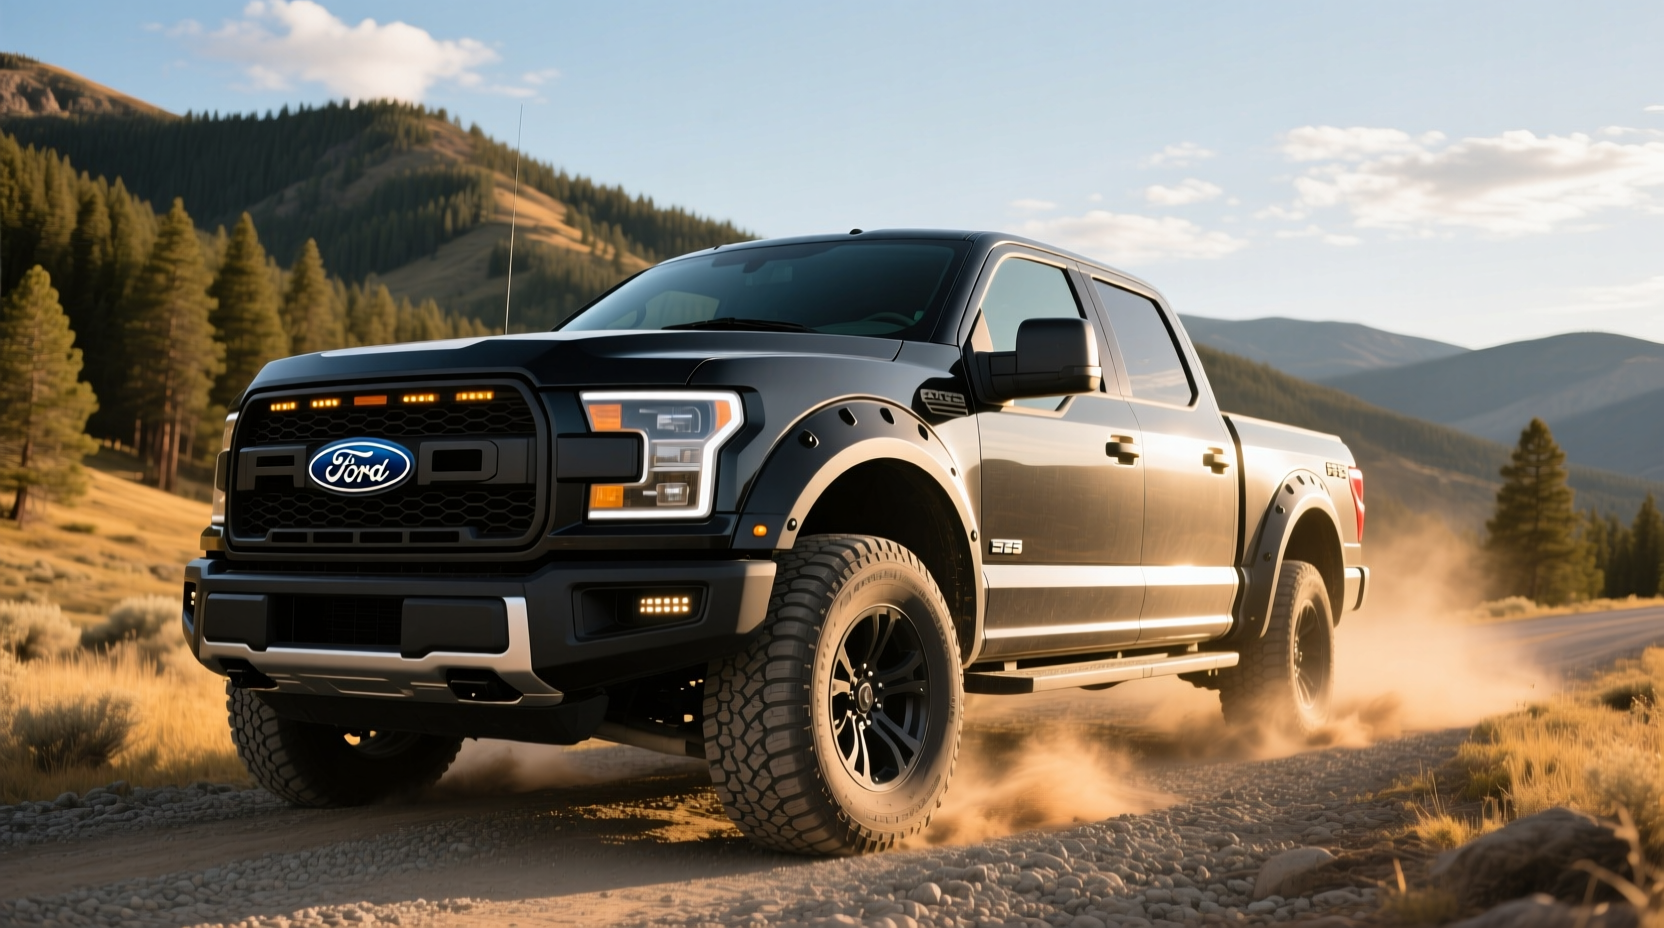
Choosing the right Ford F-150 fender flares can make a significant difference in both protection and appearance, especially if you're running oversized tires or frequently drive off-road. After analyzing hundreds of user queries, product listings, and installation reports, we’ve determined that the most common needs include proper fitment across model years (2009–2026), material durability (plastic, fiberglass, steel), compliance with local regulations, and ease of installation. This guide breaks down everything you need to know—from OEM vs. aftermarket differences to flare styles like bolt-on, cut-out, and integrated designs—so you can make an informed decision without overpaying or buying incompatible parts.
Why Do Ford F-150 Owners Add Fender Flares?
Fender flares serve both functional and aesthetic purposes. For many F-150 owners from 2015 to 2025, upgrading to larger tires is a top priority1. However, wider or taller tires often extend beyond the factory fenders, increasing the risk of mud, rocks, and debris being thrown onto the truck bed, cab, or other vehicles. Fender flares bridge this gap by extending outward to cover tire overhang.
Additionally, some states and provinces have laws requiring that tires be covered by bodywork during operation. In places like California and Ontario, exposed tires may result in fines unless properly shielded by flares or mud flaps. Installing compliant flares ensures your modified F-150 remains street legal while enhancing its rugged look.
From a styling perspective, aggressive flares—especially those found on Raptor models or lifted trucks—give the F-150 a more muscular stance. Many buyers opt for wide-body conversions or fiberglass fenders with built-in flares to achieve that off-road-ready appearance.
Types of Fender Flares for the Ford F-150
Not all fender flares are created equal. The type you choose depends on your vehicle’s configuration, intended use, and whether you’re replacing damaged panels or modifying for aesthetics.
Bolt-On Flares ✅
These are the most common aftermarket option. Bolt-on flares attach directly over the existing fenders using screws or rivets. They require no permanent modification and are typically made from flexible thermoplastic or ABS plastic.
- Pros: Easy to install, removable, affordable ($80–$250)
- Cons: Can rattle if not secured properly; less durable than full fender replacements
- Best for: Stock or mildly lifted trucks needing extra coverage
Popular brands include Rough Country and Air Design, which offer OE-style kits designed specifically for 2018–2020 and 2021–2025 F-150s.
Integrated Flares (Full Replacement Fenders) 🔧
Instead of adding flares on top, some owners replace the entire factory fender with one that has flares molded in. These are commonly seen in Raptor-to-standard F-150 conversion kits.
- Pros: Seamless look, better aerodynamics, stronger material options (fiberglass, FRP)
- Cons: Requires professional painting and alignment; higher cost ($600–$1,200+)
- Best for: Lifted trucks, off-road builds, custom restyling
FiberwerX and SDHQ Motorsports produce high-quality fiberglass fenders that replicate Gen 3 Raptor styling on earlier models.
Cut-Out Flares 🛠️
Cut-out flares involve modifying the original fender panel by cutting sections away and inserting flare extensions. This method blends factory sheet metal with aftermarket components.
- Pros: Custom fit, maintains factory lines
- Cons: Permanent alteration; requires welding or bonding skills
- Best for: DIY enthusiasts with fabrication experience
OEM Factory-Style Flares 🏭
Ford offers genuine accessory fender flares through dealerships. These match the factory design and finish, ensuring seamless integration.
- Pros: Guaranteed fit, color-matched options, warranty support
- Cons: Higher price ($400–$600); limited availability for older models
- Best for: Owners prioritizing authenticity and resale value
The official F-150 2021–2023 fender flares from Ford Motor Company are sold as part of their exterior accessories lineup and are engineered to complement wheel and tire upgrades.
Material Differences: Plastic, Fiberglass, Steel
The material impacts durability, weight, repairability, and cost.
| Material | Lifespan | Impact Resistance | Weight | Average Cost |
|---|---|---|---|---|
| Thermoplastic (ABS) | 5–8 years | Moderate (flexes under impact) | Light | $80–$200 |
| Fiberglass (FRP) | 10+ years | High (brittle but strong) | Moderate | $600–$1,200 |
| Steel | 15+ years | Very High (dents but doesn’t crack) | Heavy | $150–$350 |
Plastic flares are ideal for budget-conscious buyers who want quick installation. Fiberglass suits serious off-roaders seeking a lightweight yet rigid solution. Steel fenders are rare as add-ons but sometimes used in commercial or fleet applications where dent resistance matters more than weight.
Compatibility Across Model Years
One of the biggest challenges when shopping for Ford F-150 fender flares is ensuring compatibility across generations. The F-150 underwent major redesigns in 2009, 2015, and 2021, each affecting fender shape and mounting points.
- 2009–2014 Models: Use twin I-beam front suspension; fenders have a boxier profile. Aftermarket flares must account for hood line and headlight placement.
- 2015–2020 Models: Aluminum body introduced; fenders are lighter and slightly curved. Look for kits labeled “Gen 14” or “Aluminum Body.”
- 2021–2025 Models: Updated grille and bumper design; newer flares often integrate LED marker lights. Some kits work across 2021–2026.
Always verify fitment using your VIN or consult manufacturer charts before purchasing. Misfitting flares lead to gaps, misalignment, and potential water intrusion.
Installation Process and Tools Needed
Most bolt-on flares take 1–2 hours to install with basic tools. Full fender replacements require advanced mechanical knowledge and possibly paint services.
For Bolt-On Flares ⚙️
- Remove wheels (recommended for access)
- Clean fender surface thoroughly
- Test-fit flare without fasteners
- Drill pilot holes if required
- Secure with included hardware
- Reinstall wheel and check clearance
Tips: Use rubber washers to prevent cracking. Apply thread locker on bolts exposed to vibration.
For Full Fender Replacements 🚗
- Disconnect battery
- Remove headlight assembly and grille trim
- Unbolt old fender from hinges and frame
- Transfer wiring harnesses and sensors
- Align new fender and secure temporarily
- Adjust gap tolerances before final tightening
- Send to body shop for priming and painting
This process can take 8–12 hours for experienced mechanics. Professional installation is highly recommended.
Cost Breakdown: What You’ll Pay
Pricing varies widely based on type, brand, and labor.
- Bolt-on kits: $80–$250 (DIY install saves labor)
- OEM flares: $400–$600 (includes dealer markup)
- Fiberglass fenders: $600–$1,200 per pair (plus $300–$600 for paint)
- Professional installation: $150–$400 depending on complexity
Used or CAPA-certified fenders (like FO1240272 or FO1241300) can reduce costs significantly, though condition varies.
Legal and Safety Considerations
In the U.S., federal law doesn’t mandate fender flare usage, but individual states do regulate tire coverage. For example:
- California Vehicle Code §27600: Tires must be covered by fenders or flares when the vehicle is unladen.
- Texas: No specific requirement, but officers may cite for excessive debris throw.
- New York: Requires fenders to extend at least half the tire’s width.
Check your state’s DMV website or consult a local mechanic familiar with inspection rules. Non-compliant setups could fail safety inspections or result in citations after accidents involving road debris.
Common Mistakes to Avoid
Based on user feedback and forum discussions, here are frequent errors:
- Buying the wrong year/model kit: A 2018 flare won’t fit a 2022 due to body changes.
- Skipping surface prep: Leads to poor adhesion and peeling.
- Over-tightening screws: Cracks plastic flares.
- Ignoring light wiring: Newer kits include side markers; improper grounding causes flickering.
- Assuming all 'universal' fits work: True universal flares rarely align correctly on modern F-150s.
Where to Buy Ford F-150 Fender Flares
Several reputable sources offer genuine and aftermarket options:
- Ford Official Accessories Site: Best for OEM parts with guaranteed fit.
- CarParts.com, Partsgeek: Competitive pricing on CAPA-certified replacements.
- FiberwerX: Specializes in fiberglass conversions for Raptors and lifted trucks.
- eBay: Useful for used or discontinued parts, but verify seller ratings and photos.
Avoid third-party marketplaces that don't provide detailed fitment data or return policies.
Maintenance Tips for Longevity
Proper care extends flare life:
- Wash regularly: Dirt buildup traps moisture and accelerates degradation.
- Inspect fasteners monthly: Vibration loosens bolts over time.
- Touch up paint chips: Prevents rust under fiberglass or metal edges.
- Check for cracks: Especially in cold climates where plastic becomes brittle.
FAQs About Ford F-150 Fender Flares
Here are answers to common follow-up questions based on real user searches and community discussions.




 浙公网安备
33010002000092号
 浙B2-20120091-4